Monday, December 23, 2013

Another Christmas filled with gingerbread.

As my last two orders for gingerbread houses left to be devoured by their owners this Christmas, I would like to take this moment to wish everyone a very Merry Christmas and a safe holiday season. 


I'm ready to take a well earned break, with a couple weeks off work and my holiday baking hobby finished I'm all set for a few sleep ins, catching up on some reading, preparing for my trip in January and making the most of the warm summer to get to the beach. 


Take care everyone!


Monday, December 16, 2013

Lemon bundt cake

I was testing out a recipe to make on Christmas Day. 

And it was a winner!


 I will post a link to the original recipe here but I did alter it just a little as my bundt pan is only 16cm.

The stickers on my bundt pan said it needed half quantities of recipes that are required by standard 22cm pans.
And how do you halve 3 eggs?

I rarely eat eggs unless it's French toast or in baking of course, and I really don't like throwing good food away even if it's something I won't eat. 

So below is my version of the recipe suitable for a 16cm bundt pan. Double it for your 22 cm pans or follow the original recipe I'm sure it tasted great too!

Lemon bundt cake for 16cm pans

11/2 cups flour
1 tsp baking powder
1/2 tsp baking soda
1/4 tsp salt
Just under 1 cup sugar
100g soft butter
1 egg
1/2 tsp vanilla extract
1 tbs lemon juice
zest of 1 lemon
1/2 cup milk

Lemon Glaze

1 cup icing sugar
1 tbs lemon juice

Bundt cake

  • Preheat the oven to 180'C.
  • In a mixing bowl, whisk together the flour, baking powder, soda, salt and the lemon zest.
  • Generously grease and flour the bundt pan.
  • In a second mixing bowl, beat together the butter and sugar until light and fluffy.
  • Add the egg, beating well.
  • Add the vanilla and lemon juice and beat well again.
  • Mixing on low speed, add the dry ingredients alternating with milk. Increase the speed to medium and beat for 2 minutes.
  • Pour the batter into the bundt pan.
  • Bake for 30-40 minutes, or until the toothpick inserted in the center comes out clean.
  • Cool the cake for a few minutes in the pan. Place your serving plate over the top of the pan and flip it upside down. Tap the pan gently until the cake releases right. Cool cake completely before glazing.
Lemon Glaze 
  • Place icing sugar in a mixing bowl. Add lemon juice and whisk in. You want thick but still pourable - so it flows down the sides of the cake. 
  • Glaze the cooled cake.


I will be taking 2 desserts to Christmas Day. The second I haven't tested out as one of my sisters made it recently for her friends so I know it works and tastes great (she has been asked to make it again for her friends Christmas Eve celebrations). I will post that recipe as soon as I have made it. 

I may be linked up at these parties.


So excited.......
The Wednesday Roundup

Monday, December 2, 2013

10 minute vanilla slice


A friend of mine posted a link to this recipe via Facebook and I just needed to try it. 

Regular vanilla slice (or snot block as it is usually called around here) is just a little to rich for me. If cake shops made them with half the amount of custard I would be so happy but this is a great alternative. 

It's not an actual custard filling - it's a mix of whipped cream and vanilla pudding which makes it that bit lighter in texture. 

It all comes together very fast and just needs to be chilled until serving. It can last 4-5 days easily stored in the fridge and gets better as the days go on as the biscuit layers soften up a little. 

Ingredients
1 packet lattice biscuits
300 mls cream
1 cup of milk
1 packet instant vanilla pudding
2 cups Icing sugar
Flavour for icing- see options below or make up your own!

Method


Lay biscuits shiny side up in the base of a 22-23 cm square pan.

In a mixing bowl whip cream to soft peaks then add milk and instant pudding mix. Whip for a few minutes until thick and fluffy. Spread the vanilla cream filling on to the biscuits and top with a second layer, shiny side up.


Mix icing sugar with
1/2 tin passion fruit pulp
Or 
1/2 tsp vanilla extract and water 
to make a thick icing that is still pourable and spread over the biscuits. 
Cover and refrigerate for 2-3 hours

Slice before the icing is completely set to prevent cracking and return to fridge until required. 


I made 2 batches of this vanilla slice within 6 days and none went to waste. 

The second batch I didn't slice until the following day and the icing cracked, resulting in less pleasant looking slices but it still tasted great. 

The icing options are totally up to you. I like the passion fruit but friends were raised with their "snot blocks" being vanilla icing either plain white or tinted pink. 

Mix it up and try any flavour you want.  

Mmm I'm thinking chocolate.....


You may notice the boxes in the container. I didn't have a square cake tray so I used my Tupperware cake container and lined it with baking paper. To keep the edges straight I wedged some boxes from the pantry into the gaps and this worked a treat. 
I did purchase a square tray for the second batch. 

I may be linked up at these parties.

Sunday, November 24, 2013

Cornflake biscuits.

I can't believe I've been absent again, not through lack of baking though, but I've not had many successes of late. 

I recently went to a Christmas ornament party, like Tupperware, but with hand made ceramic decorations. I've been to several of these over the years and am slowly building my collection. I'll share my latest additions when they arrive. 

At this party there was a lovely spread of afternoon tea goodies and as the host is not only one of my closest friends but also a very generous person she sent me home with a plate of delicious treats. 

The cornflake biscuits were soooo good. I rationed them out over the week just so they would last a little bit longer. The following weekend I made an attempt to make my own. And ohhhh what a failure. 

I had looked online at several biscuits recipes, and altered a recipe that uses another cereal. I knew from the first batch  coming out of the oven that they just weren't right. I made a slight change to the remaining dough but nope, not the same as the original ones I'd had. 

When I next caught up with my friend I asked if she wouldn't mind asking the lady who had brought the biscuits if she wouldn't mind sharing the recipe. 

And a few days later.....

"You've got mail"

Into my inbox arrived the recipe. 

So, because delicious food should always be shared, here is the recipe to try for yourself. 


Sally's cornflake biscuits. 
125g butter
3/4 cup sugar
1 cup sultanas
1 egg
1 cup self raising flour
Cornflakes

Cream together the butter and sugar until light and fluffy. 
Add the egg and beat well. 
Fold in the sifted flour alternatively with the sultanas. 
Roll teaspoons of the dough in lightly crushed cornflakes. 
Place on a greased baking tray in a moderate (180C) oven for 10 - 12 minutes or until the edges just turn brown. 
Cool on the tray for a few minutes, before transferring to a wire rack. 

Make a cup of tea, sit back and enjoy!

- not a fan of sultanas? replace with chocolate chips!

I may be linked up at these parties.

Saturday, October 12, 2013

Infused vodka

After a recent night out at a local vodka bar, my friends and I were keen to try out making our own infused vodka. 


For my first attempt I used raspberries and apple. 


It's just so easy to chop up some fruit stick it in a jar and cover with some good vodka. From all descriptions I found online you just leave it in the pantry and give it a shake twice a day. Test the flavour every couple of days and if need be, replace the fruit after 7 days to increase the flavour or top up with vodka if the flavour is too strong. 

This first try didn't develop a lot if flavour. But there was an apple after taste. Next time I will crush the berries. 

My second test was using a black current puree. The flavour was great after just 5 days, but it wasn't pure black currents, they were in a syrup so the mix does need to be shaken prior to serving. 

Serve straight or with a mixer with a wedge of lime. 


I'm ready for summer!

I may be linked up at these parties.

Sunday, October 6, 2013

Lotion bars


Working in early childhood means washing my hands is something I do all day long, so they get very dry and sore if I don't moisturise them often.

I came across this post (via this post) and bells were ringing... I can do this, and there is no risk of finding liquid lotion squirted through my bag at the end of the day.

I dropped into a local health food store and picked up the ingredients. 


I did substitute the almond oil for avocado oil as nut products are discouraged at my work (and I don't need my hand lotion to be the cause of someone else's allergic/ anaphylactic reaction)

One thing I did forget was to grab some essential oils, I used some dodgy oils I had bought ages ago and they just smell fake. So this batch won't be shared, it's all for me.

Want to make some yourself? Mix equal parts of bees wax pellets, coconut oil and avocado oil (or almond/ jojoba etc) in a double boiler, add any essential oils then pour into moulds of choice and leave to set.


I used a metal mini muffin tin and they popped out fine.

If yours don't set firm enough, just melt them down again and add some extra bees wax pellets.

I wonder if I could mask the fake lime smell if I melted them down again????

Now I keep one of these in my bag and in my desk in little containers and the rest are stored together in sealed container in the fridge (just because the weather is getting warmer here and I'm not sure if that will affect them)

I may be sharing at these parties.

Sunday, September 29, 2013

Tin roof sundae pie

Now how this ice cream pie gets its name, I have no idea. But all the same it is delicious. 


This was another recipe sent to me by my dad, after he discovered that the second caramel ice cream pie was no longer in his freezer (oops we had eaten it)
So I made him this for Father's Day. 
I followed this recipe exactly apart from - not having the exact sized pan so I should have used more ice cream. We also don't have light corn syrup here in Australia but our glucose syrup is just about the same just thicker so I did microwave it briefly to make it easier to mix.

Now the flavour of this is a mix of nutty honey joys, ice cream and chocolate. What's not to love?


I may be linking up at these parties!

Saturday, July 27, 2013

Mini donuts with maple syrup frosting

Recently I finally had the opportunity to try out Erin from making memories with your kids maple syrup frosting. I have seen her use this recipe on a few different items and they always looked so delectable.


So in preparation for my dogs 2nd birthday -but first with me since he was adopted at 15mths old- I tried out cooking some mini donuts to share on the day.


I'm not sure where I saw it, but somewhere here in blog land I saw the concept of making donuts in a donut press using a boxed cake mix. With the only difference of following the box instructions was using only half the liquid measurement. 

So I mixed up the batter, placed teaspoons into the press and made batch after batch after batch. 
Looking good so far. 

I tried to mix the frosting up in between batches, but it was easiest to do it afterwards. Those little donuts don't bake for long. 


A dollop of frosting on each, and they were just too hard to resist. 

Honestly they were better the next day, the frosting settled into the donuts and they tasted donuty rather than cakey. 


So Happy Birthday to Toby. 
Here he is sharing a doggie friendly donut with 2 of his cousins.

It was just the humans who got to eat the maple frosting donuts.

I may be linked up at these parties.

Saturday, July 20, 2013

M.I.A & Cherry Ripe Brownie Bar.

I cannot believe it has been 3 months since my last post. I have baked, crafted, sewn & DIYed and none of it has made it to my blog yet.


I can't even blame a busy life or holiday as to why it has been so long... I just had a little hiatus. 
But as its winter here in Melbourne I might as well use the cold wet weather to stay in and catch up on my blogging. 

Where to pick up again???

I've had a look through my photos and there is a bit to choose from. 

So I think the first thing I'll share is the last thing I made. 

My dad is a big influence in what I bake, he loves to create in the kitchen just as much as I do, so each week there is a new email of a recipe he'd like me to try out. 

So here it is....

Cherry Ripe Brownie Bar. 

The recipe came from taste.com.au

I followed it almost exactly, the differences I had were:

1. I used a loaf pan as I could not find a bar pan to the dimensions stated

2. The brownie needed to be baked about 10min longer (although I believe it's my oven to blame, not the recipe)
Fingers crossed some time in the next month my new oven will be delivered and installed.


It was very rich and sweet, so it's ok that it's only small, it goes a long way. 
It would be great to take as a slice to share with friends, it is best made the day before as it does take some time, but it is sooo worth it. 

I may be linked up at some of these parties.

Sunday, April 28, 2013

Tuna dip

I have had a lemon tree in my yard for 5-6 years and finally I have usable lemons on it.

With my first lemon I made my favorite tuna dip.

250g-350g spreadable cream cheese.
95g tin of tuna in spring water,drained.
juice of 1 lemon.
1 tbs chopped parsley.
Blend all of the above in a food processor and serve with any crackers.

I may be linked up at these parties.

Chicken Pot Pie.

A simple and easy dinner to put together would have to be Chicken Pot Pie.

I don't have exact measurements or ingredients, just what ever takes my fancy that night.

But a basic guide is......

2 Chopped chicken thighs
1.5 cups rice (I don't actually measure this, I just pour)
2 cups of finely chopped vegetables (what ever you like, and frozen is fine)
1 can of cream of chicken (or mushroom or corn) soup.
Herbs to taste.
1 sheet of puff pastry.

I fry off the chicken in a pan and add any fresh vegetables and dried herbs, and cook until tender. I add the can of soup and stir through. (fresh herbs can be added now if they don't need to be cooked off)

In a pot of water I put the rice and any frozen vegetables and boil until the rice is cooked, drain.

Then it's a matter of assembling.

I place the rice and veg in a square baking tray and pour on the chicken/veg/soup mix, mixing them together just slightly on the top.

I then either place an entire sheet of pastry on the top or cut it up and lattice the pastry.

Bake in a medium oven until the pastry is nice and brown and ta da!!! it's done!

I may be linked up at these parties.

Tool storage in plain sight - part 2

So it took a little longer than a day to get some more paint, but I made it in the end.


I finished the purple colour and then made the decision to lace paint the trunk.

I chopped up some old curtains that the previous owners had in my house.

Using a spray adhesive I sprayed the back of the curtain, let it sit a couple minutes before pressing it onto the trunk.

I then lightly sprayed over the lace with silver/chrome paint and left it to dry before peeling off the curtain.

This was the result....not sure if it will stay this way. The silver is a little more glossy than I would like so it may get a little white wash over the top.

I still need to finish the handles and lock in a silver polish I have..... but it's a tiny tube and it hasn't come out from hiding yet.

So this trunk now sits in my dining area near the back door. It is filling up with lots of goodies and can be dragged along to any task thanks to those fab little wheels.

View part 1 here and maybe one day maybe there will be a part 3.

I may be linked up at these parties.

Sunday, April 21, 2013

Tool storage in plain sight - part 1.

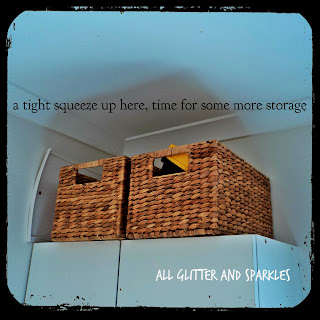
Living in a 2 bedroom unit, storage space is very valuable. I'm lucky enough to have a single car garage but space is minimal and often inaccessible when the car is in there.


I previously kept my tools in two baskets on top of the laundry cupboards. Handy and accessible when needing to do a little task but over time I have acquired more and more tools, bits and pieces etc. and these two baskets were overloaded. At Christmas I received my very own cordless drill (no more borrowing from family) and well it just would not fit in a little basket.

So time to create a new storage space.

I thought about getting a purpose built tool box and had eyed off one that my dad has in his garage, but it wouldn't be great room decor and as said before I wouldn't be able to get at it if it was kept in my garage.


I currently keep my sewing machine and accessories in a trunk in the living room that doubles as a side table and place to put my room decor etc.

I liked this idea for a giant tool box.

   Inside this trunk is my sewing machine

So I kept my eye out for a trunk. It took a while to find the right size and I found most had a fabric outer and I had my heart set on painting the trunk in some way.


I eventually found this trunk at 'Sam's Warehouse.'


I picked up some castor wheels to make sure this new toolbox would be portable and put my new cordless drill to use.


I started spray painting the trunk in violet, in light coats. and of course during coat 3 the can ran dry. I thought about making a quick trip to 'Bunnings' to grab a new can but the clouds heading my way put a halt to that so I had just enough time let the last coat dry before bringing it back inside. Hopefully tomorrow will be dry and I can finish the violet coat.

I may be linked up at these fab parties.

Wednesday, April 3, 2013

what's next.....

The past few weeks have been filled with illness and aches, so I have done very little baking/crafting/DIY.

...........A few things have been started but not finished.

I did make 5 more ticket stub memory box's for friends and have the supplies for 2 more.

I have brought home fabric for different projects and not started one........

I've had a few failed cooking experiences in the kitchen, edible and delicious but ...well... I was sure I followed the recipe both times but this was the results. 


I will be giving these another go. The original recipe was for American style "biscuits" but in truth I much preferred the 1st attempt which mine turned out like cookies (we call these biscuits)

oh well, I'm sure I will feel back in the groove soon.

Tuesday, March 19, 2013

Red Velvet Cookies

Using the simple method for a cake mix cookie, I was able to make Red Velvet Cookies.


Take 1 store bought cake mix for Red Velvet Cake, mix in 2 eggs and 1/2 cup vegetable oil.

Scoop spoonfuls onto a lined baking tray and bake in a 180C oven for 8 to 10 minutes.

Allow to cool on the tray for 5 minutes before transferring to a cooling rack.

Once cool dip or swirl melted chocolate on top, chill, and you're done.

Now as I live on my own, a whole batch of cookies gets wasted. So I usually bake 8 to 10 cookies and with the remaining cookie dough I roll it into a log, wrap in cling film and then aluminium foil and place it in the freezer.

When needing a little sweet snack, I can slice a few rounds of dough off the frozen log and bake in the oven for 10 minutes. 

With my first frozen batch I added a white chocolate melt to each as soon as they came out of the oven. It melted just enough to stay stuck to the top.


This method will work for just about any cake mix. I am yet to find one that doesn't work.

I may be linked up to these fab parties.

Monday, March 11, 2013

Banana Pistachio Bread

This would have to be one of my most favourite recipes for banana bread.

It is very simple to make, and even better topped with cream cheese icing.


Banana Pistachio Bread

2 cups all-purpose flour
3/4 cup sugar
2 1/2 teaspoons baking powder
1/2 teaspoon salt
2-3 bananas, mashed (1 cup)
1/3 cup vegetable oil
1/3 cup milk
1 egg, lightly beaten
1/2 cup shelled pistachios, chopped

Preparation
1. Preheat oven to 180C (or350F).

2. Grease one 9 x 5 x 3-inch loaf pan.

3. In a large bowl stir together flour, sugar, baking powder and salt. In a small bowl stir together bananas, oil, milk and egg; stir into flour mixture and add the chopped pistachios just until moistened; do not over-mix.

4. Spoon batter into prepared pan. If desired, sprinkle a few whole shelled pistachios over the batter for garnish.

5. Bake for 50 to 60 minutes until wooden pick inserted in center comes out clean. Cool in pan 10 minutes; remove loaf from pan and cool on wire rack. Store bread tightly covered; or wrap tightly in foil and freeze for up to 1 month.

Cream Cheese Icing

1 cup icing sugar
100g cream cheese, softened
45g unsalted butter, softened
1 tsp lemon juice, if you want that extra zing.

Place all ingredients for the icing into a medium mixing bowl and mix well until the icing is creamy. Spread on the loaf once cooled.


I may be linked up at these fab parties.

Thursday, March 7, 2013

Giant Easter Freckles

Chocolate freckles, yum one of the first things I pick out of a lolly mix. 


So long as it's decent chocolate. and by that I mean decent in my eyes (or taste buds). I am very fussy when it comes to chocolate, there are only a few brands I like, many big brands here in Australia I really dislike. It's not just the taste it's the melting texture that can have me cringing.

With Easter coming up it's time to drop a few hints of the two brands that are ok to give as gifts. Well in all honesty they are the same manufacturer, they just trade under different labels with Easter chocolate.

We are not big Easter gift givers anyway and over the past few years, we have had a family lunch sometime around the Easter long weekend, sometimes even the next weekend, due to family going away etc. 

I have been making Easter gifts for a few years now. Some haven't been great. But these chocolate freckles went down well.

I melted some milk chocolate over a double boiler and then poured it into small pizza trays. I sprinkled lots and lots of Hundred and Thousands on top and let them set in the fridge.

They easily popped out of the trays. I sealed each into a cellophane bag with a little bunny gift tag. I think I found the image by doing a simple image search.


I may be linked up at these parties.